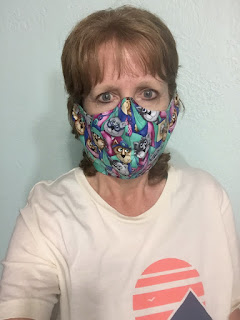
We have a unique opportunity to impact our community.
We can do this! Let's start sewing!
(Updated info in red ink)
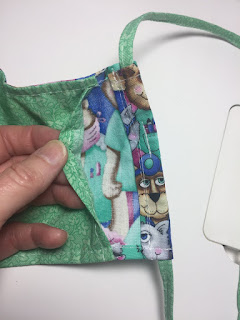
Here is the pattern our group has chosen to use based on the input of several nurses. This pattern has a pocket with the opportunity for the person wearing it to add some type of filter. As with most projects the first one may go a little slow, but once you figure out the pattern, it can easily be adapted to assembly line sewing.
When printing off the pattern, please be sure to look for a box labeled "scale" when you print the pattern. When I printed mine the "scale box" said 73% so my first mask was a smaller size. It is not a bad idea to make various sizes, but just wanted to point out that the smaller sizes will limit who is able to wear them.
This pattern also has a You Tube tutorial that is very well done. If you have questions regarding construction, you may want to view it more than once.
- Please use two different colors of fabric
- Please use 100% tightly woven, high thread count cotton fabric.
good fabric to use. Cotton fabric that is breathable, with a denser weave will help to
capture a greater number of potential viral particles.
Here are some things to note regarding construction:
- The pattern will call for a 3" piece of wire. We need to get creative and use what we have on hand such as paper clips, pipe cleaners, jewelry wire, or floral wire.
- Pay close attention when you zig zag over the wire. You do not want to break your machine! You may want to zig zag, then insert the wire.
- Be sure to curl the ends of the wire so it does not poke someone in the nose
- Please be sure to secure the wire so it does not pierce the fabric and can hold up to repeated washing.
- Elastic is already in short supply and sold out almost everywhere. Please do not leave your house to look for it. Bias tape can also be used to create fabric ties if you have it on hand.
- You can also create your own ties by cutting a total of 2 - 1" x 42" strips of fabric (photo on left) for each mask. Fabric does not need to be cut on the bias.
- Next, press the narrow sides of the fabric in half lengthwise and the fold each side in to the fold line as shown in the photo on the right.
- You may find it helpful to create fabric ties by using a "Bias Tape Maker" as shown in the photo above. (Clover brand, size 12) When fabric is inserted, it can easily be pressed without burning your fingers. Here is a video tutorial that may be helpful.
- You can also use straight pins to help create bias tape. Here is a video that may be helpful.
- Once pressed, stitch down the entire length of the tie with a straight or zig zag stitch. The hospital has requested that we secure the ends of the ties with stitching or a with a knot.
- If you make the casing on the mask a little wider, you can and easily insert the fabric tie. Be sure to stitch the tie in place so it will hold up to being laundered.
- If you stitch a short distance along the top edge (left photo), and totally along the bottom edge (right photo), the masks will hold up better in the laundry.
- Place complete masks in a Ziploc bag with the number included written on the bag.
Thank you for your willingness to help!
I pray that we represent Him well
as we Sew, Quilt, and Share!
Sandra
Due to an overwhelming amount of spam, comments for this article have been turned off.


No comments:
New comments are not allowed.