
Recently, my "baby" graduated from college. I wanted to do something special to celebrate this milestone in her life so I told her I would make her a quilt...her first bed quilt made by me. I thought about making this a surprise, but decided to get her involved in the process of choosing the color and pattern. Her decision? A black and white string quilt. Black and white? Are you serious? I had never seen an all black and white quilt. This was going to be an adventure!
I found instructions for a string quilt at maryquilts.com I was familiar with Mary's site and found the details of constructing the block easy to follow. I realize now that I should have taken more photos of the work in progress, but it honestly was a fairly easy project to piece together.
 I purchased various black and white prints, and tried to put it together with a scrappy look which makes string quilts so interesting. According to what I was able to research about this style of block, the blocks can be put together in the paper piecing method, or can be pieced on muslin. Since this was my first attempt at a string quilt, I chose the muslin method. One comment about the finished product was that the muslin did make the quilt heavier, but other than that I found no negatives constructing the blocks with a muslin backing, although it would be more difficult to hand quilt.
The above photo shows the finished quilt top ready to be pinned to the backing.
Ok...so now to determine how to quilt this thing. I've made many baby quilts, and lap quilts...but this was my first attempt at machine quilting a queen size bed quilt. I knew I needed some help to pull this off.
 One of the most helpful ideas came from this you tube video. The video shares an idea on how to put together an inexpensive quilting table. Although I had a great basic set up, the idea that I gained from this video was to use of a large sheet of plastic to cover my sewing table.
I purchsed some quality plastic from Hobby Lobby for about $5.00. (You can find it in the fabric section on a roll. I think in days past, some women used this plastic to cover their furniture...lol) Once I had it laid out over my sewing space, all I had to do was cut a small hole for the needle to go up and down. I did struggle a bit to figure out just how this idea could be adapted to my space, but once it was set up, it worked like a dream. Even with a large queen size quilt, the fabric moved easily over the plastic.
 As you can see, there is alot of fabric here to process!
I decided to stipple the entire quilt.
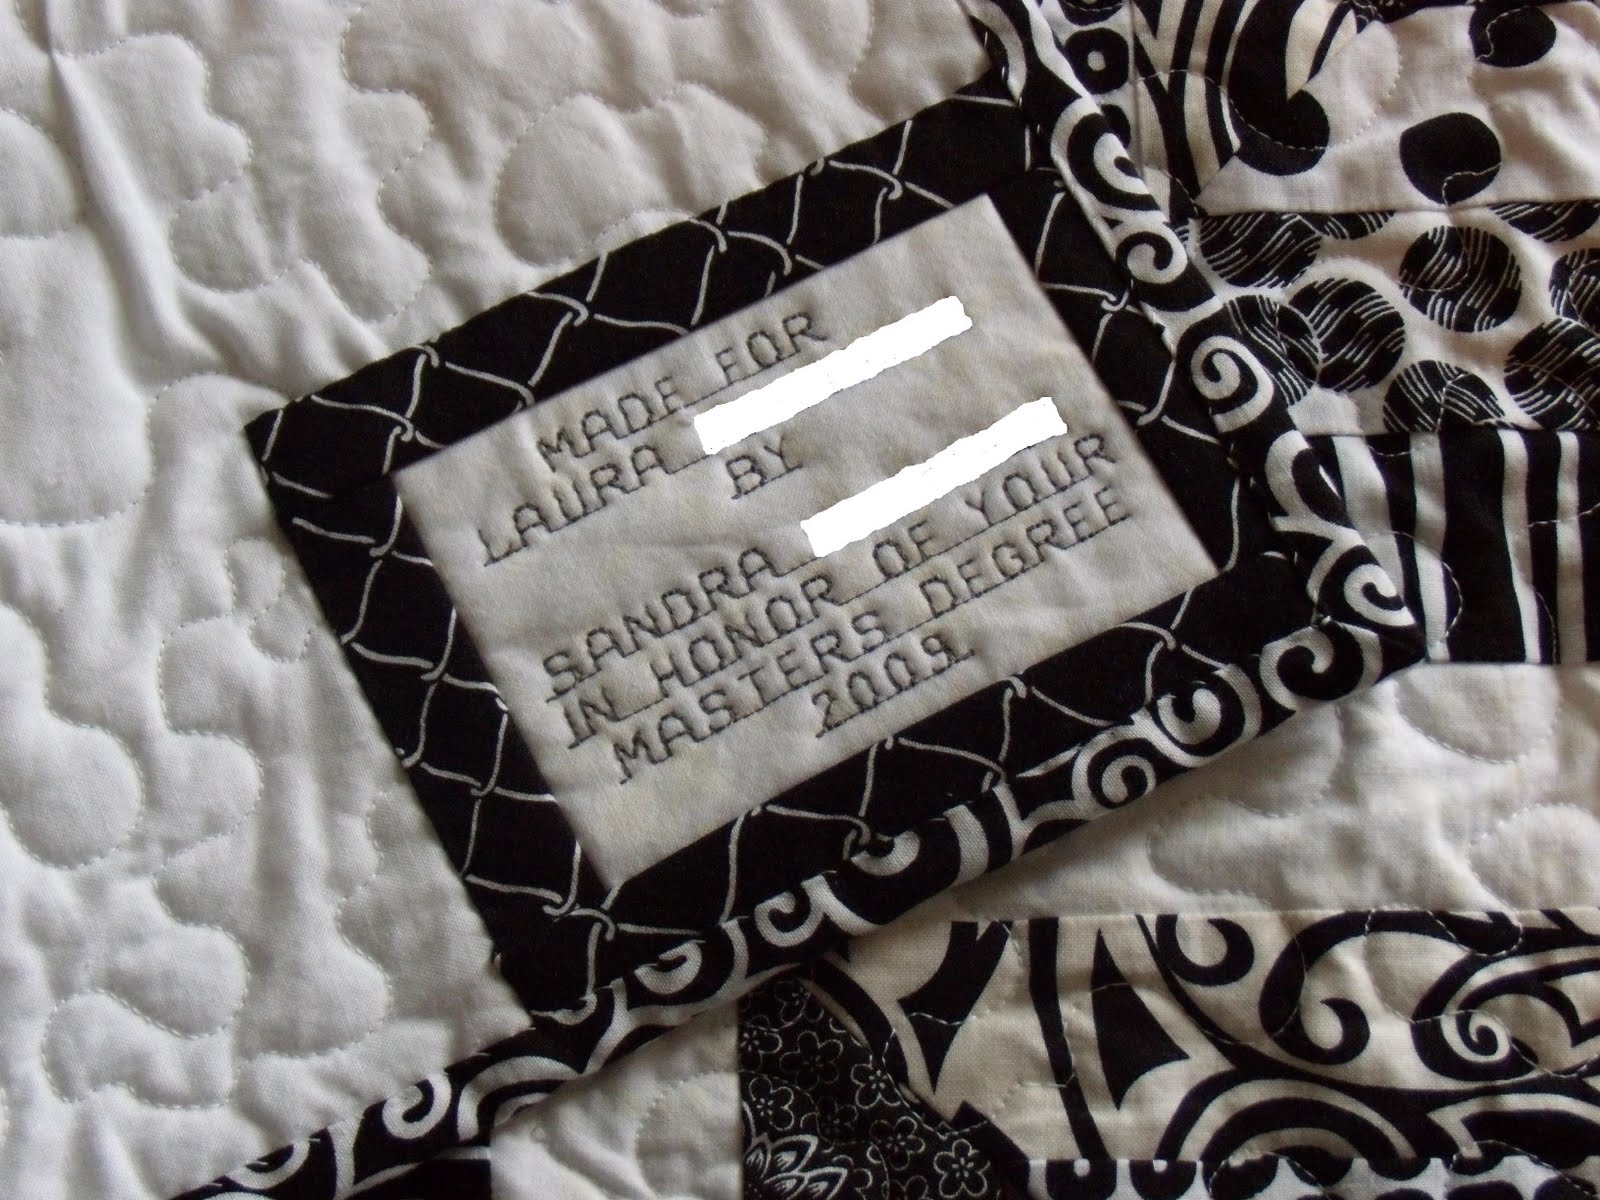 This a a close up of the quilting, and the tag I put on the back...
(Our last names are blocked out for privacy.)
 ...and wa-la...here is the finished product! I really didn't keep track of the number of hours it took me to quilt this, but was able to finish it over a five day period, working at it on and off. I regret that I didn't take more photos of the final product, but it turned out better than I ever expected. This won't be my last attempt at machine quilting a bed quilt:)
That is really beautiful. I have never seen one like it with the Black and whites - but I have to say - I want one now!
ReplyDeleteIt looks great -- I'm sure she loves it!
ReplyDeleteMele Kalikimaka, Sandra! I hope you and your family had a wonderful Christmas together.
ReplyDeleteHubby is doing very well and getting stronger with each passing day. Thank you for your kind words. Take care!
Aloha!
Beautiful! I made a crib sized patchwork quilt for my son for Christmas and THAT took me a WEEK. You are amazing!
ReplyDeleteThanks for stopping by my blog.