Showing posts with label Machine Quilting. Show all posts

Saturday, December 29, 2012

Free Motion Quilt Challenge Update


Just under the wire to call this quilt a finish for 2012!


I began the process by basting the quilt together.
You can see the method I use to baste quilts here.


December's Free Motion Quilting Challenge featured several
different border patterns and was taught by Patsy Thompson.
I have several of Patsy's quilting DVD's and enjoy her style of teaching.
The secret to her method is to break down the project into manageable parts.


Following her instructions, as you can see in the above photo, I made
tick marks along the border at 1/2" increments to keep my quilting balanced.
(Be sure to use a disappearing ink or water-soluble pen.)


Once the tick marks were in place, the machine quilting
was easier than I anticipated and each border row was
quilted without incident.


Even though it is difficult to tell, there are feathers quilted
in the green border. The thread I chose and the print in the fabric
make them a bit difficult to see....but they are there. Really they are! lol
In some ways, it was a bit freeing because I wasn't paranoid about 
making mistakes since the feathers were not quite so visible.


A peek at the back.


In conclusion, Patsy was right when she said, "It looks complicated, but you can do this!"
The top was made using my scrappy postage stamp quilt tutorial
and measures 50"x57".

Check out the other finishes this week at

May you always Sew in Peace!


Wednesday, March 21, 2012

Spring!

The weather here has been unseasonably warm
and Spring is bursting forth.
Thought you might enjoy a few photos 
from my walk last evening.


Notice the bumblebee?

Mr. Bumblebee seems to have a lot of friends lurking about
so please "bee" careful!


In other news...I've take the pledge!


SewCalGal is hosting a Free-Motion Quilting Challenge 
to help participants improve their machine quilting skills.
A free tutorial is posted each month by different guest teachers 
and it isn't too late to join...so check it out!

The guest teacher for March is Ann Fahl.
Ann has some great tips posted in her tutorial and has
inspired me to move away from using cotton thread for machine quilting.
The current brand of cotton thread I am using has been such a 
disappointment due to the high lint content that is left behind on 
my sewing machine. 


Ann's tutorial includes two quilting motifs that she encourages 
participants to try. The first one is the "Loop and Twist" which you see 
in the above photo on the left. Basically, it looks like a bunch of doodling! lol
Other variations of this pattern are the 
"Loop and Star" and "Loop and Heart" 
which you see on the right side of the sample. 
It took a while to get the hang of it, but 
 I  honestly like this pattern better than I thought I would.


The second pattern was the "Spiral" which begins at the outer edge of the circle
and spins into the center. She also included a "Spiral Flower" that 
incorporates the same type of spiral for the center. Ann encourages 
quilters to begin a notebook which includes samples of their
work and different machine quilting patterns that inspire them.

Thanks to Ann for the great tips this month!
I intend to begin my notebook with the above samples:)

May you always Sew in Peace!

Thursday, July 14, 2011

Making Progress

Making progress. Yesiree!

I'm really loving the postage stamp concept
and the secondary pattern that appeared in the quilting.

Now I just need to find the time to bind it.
Hopefully soon:)

May you always Sew in Peace!
Sandra

Tuesday, May 25, 2010

Mom's Log Cabin Quilt


My mother has been a quiltmaker for as long as I can remember.
As she has aged, it has become more of a challenge
for her to hand quilt her projects. She pieced this lovely
log cabin quilt and I offered to machine quilt it for her.
Perhaps you may be interested in following the process.


In the past, I've always laid my quilts out on the carpet to
pin them together. I'm not sure about you, but it is a real
killer on the back and knees. This time I decided to try
basting on the top of a table. Since I have two tables,
I placed the tables side by side and draped each layer
over the tables, being careful to center the fabric.


To hold the fabric tight, I used several clamps from my
husband's toolbench. Using one clamp on each corner worked
better than I could have hoped! It held the fabric in place
and I was able to tighten or loosen the tension as desired.
Once a section was pinned,
the fabric could easily be repositioned.

(For anyone interested in purchasing a set of clamps, here is
a link to the brand I used.
The ones shown in my photo are
an older model.)


I have to admit, this method of pinning was a real time saver.


Machine quilting usually isn't one of my favorite steps of the
quiltmaking process. My perspective
is changing due to the larger throat space on my
new-to-me Singer 201.
Those extra inches make a
huge difference!


The extra space around the needle allowed my
hands to move freely.


I'm thinking Mom will like the finished product.


What method do you use to baste a quilt?

May you always Sew in Peace!
Sandra

Sunday, May 9, 2010

Pick Me!


Postage Stamp Quilts are made of tiny squares of
fabric. This little doll quilt is made of 2 1/2" blocks
of various fabrics to match my sewing room. The top was
 made about a year ago and has hung on my design wall
waiting patiently to be completed.


Several weeks ago I purchased a Singer 201 and was
looking for the perfect project to test out it out. I glanced
around my sewing room and the little quilt top seemed to
scream "Pick me!" So using painters tape, I marked off
the rows and began quilting.


It didn't take long to finish the quilting and attach the binding.


Not sure why some projects go so quickly and others
you have to be in the mood to finish. If you are looking
for a little push to get you going, plan to join us
 May 21st for the Friday Night Sew-In.


Take a minute and listen to what is
screaming "Pick me!" at your house.

May you always Sew in Peace!
Sandra

Monday, January 4, 2010

Jean Quilt Makeover


It doesn't look like much, but this denim blaket has been through a makeover. I originally made this quilt for my son-in-law about ten years ago, on a sewing machine I hated. I fought with every stitch and seam, and the fact that the denim was so heavy added to the difficulty. I was just beginning my quilting journey, so I decided to simply knot it and used a plain cotton on the back.

Last year when I asked him what he would like for his birthday, my son-in-law asked if I could repair his blanket. He loved this blanket!  In fact he loved it so much that the backing was raggy and falling apart. Hmmm....what was to be done?

When I determined that it was worth the effort to repair it, I decided to remove all the old backing and replaced it with a striped flannel. The original blanket had quilt batting, so after the flannel was pinned to the top, it was a candidate for machine quilting.


I left the original knotting in place and simply machine quilted around the yarn. If you attempt machine quilting on denim, I highly suggest using special denim needles like "Schmetz Denim Needles" available at stores like JoAnn Fabrics.


I am very pleased with how it turned out!
 Better than I imagined!

Monday, November 23, 2009

My First String Quilt

Recently, my "baby" graduated from college. I wanted to do something special to celebrate this milestone in her life so I told her I would make her a quilt...her first bed quilt made by me. I thought about making this a surprise, but decided to get her involved in the process of choosing the color and pattern. Her decision? A black and white string quilt. Black and white? Are you serious? I had never seen an all black and white quilt. This was going to be an adventure!


I found instructions for a string quilt at maryquilts.com I was familiar with Mary's site and found the details of constructing the block easy to follow. I realize now that I should have taken more photos of the work in progress, but it honestly was a fairly easy project to piece together.


I purchased various black and white prints, and tried to put it together with a scrappy look which makes string quilts so interesting. According to what I was able to research about this style of block, the blocks can be put together in the paper piecing method, or can be pieced on muslin. Since this was my first attempt at a string quilt, I chose the muslin method. One comment about the finished product was that the muslin did make the quilt heavier, but other than that I found no negatives constructing the blocks with a muslin backing, although it would be more difficult to hand quilt.
The above photo shows the finished quilt top ready to be pinned to the backing.
Ok...so now to determine how to quilt this thing. I've made many baby quilts, and lap quilts...but this was my first attempt at machine quilting a queen size bed quilt. I knew I needed some help to pull this off.

One of the most helpful ideas came from this you tube video. The video shares an idea on how to put together an inexpensive quilting table. Although I had a great basic set up, the idea that I gained from this video was to use of a large sheet of plastic to cover my sewing table.

I purchsed some quality plastic from Hobby Lobby for about $5.00. (You can find it in the fabric section on a roll. I think in days past, some women used this plastic to cover their furniture...lol) Once I had it laid out over my sewing space, all I had to do was cut a small hole for the needle to go up and down. I did struggle a bit to figure out just how this idea could be adapted to my space, but once it was set up, it worked like a dream. Even with a large queen size quilt, the fabric moved easily over the plastic.
As you can see, there is alot of fabric here to process!
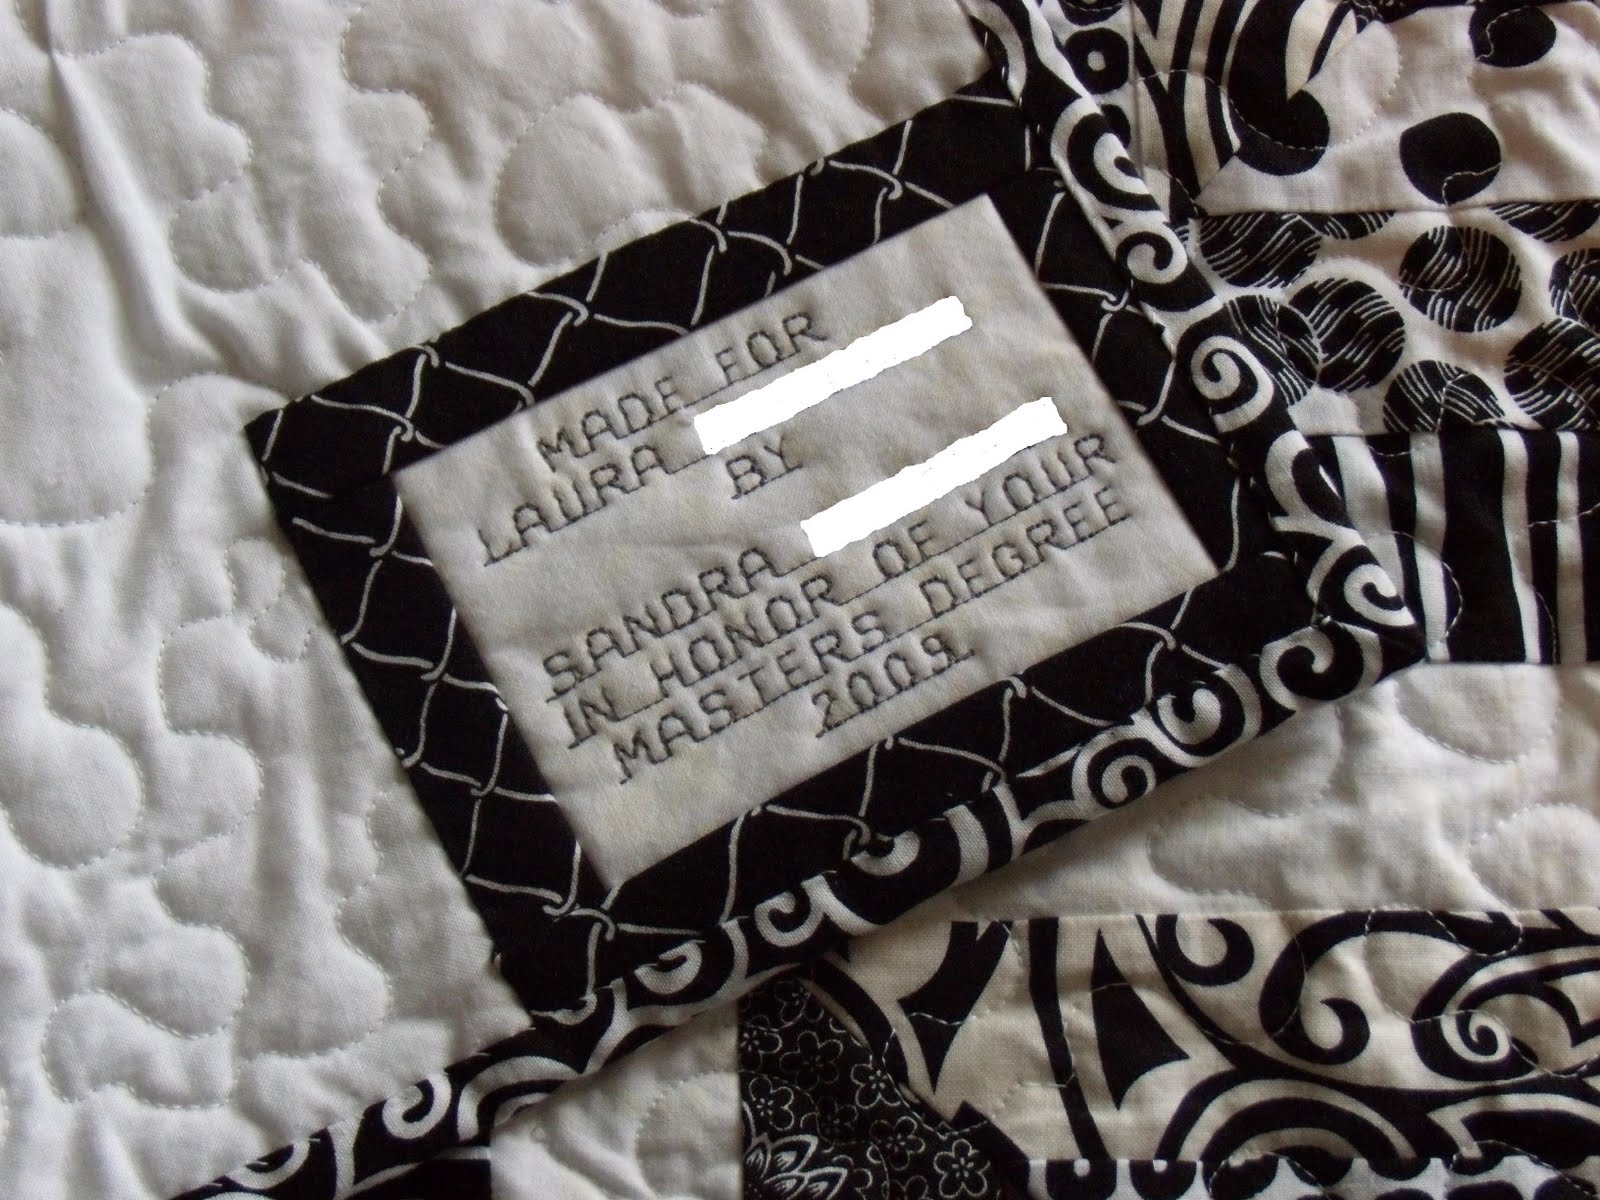

I decided to stipple the entire quilt.

This a a close up of the quilting, and the tag I put on the back...
(Our last names are blocked out for privacy.)

...and wa-la...here is the finished product! I really didn't keep track of the number of hours it took me to quilt this, but was able to finish it over a five day period, working at it on and off. I regret that I didn't take more photos of the final product, but it turned out better than I ever expected. This won't be my last attempt at machine quilting a bed quilt:)