Showing posts with label Quilts Finished 2009. Show all posts

Monday, November 23, 2009

My First String Quilt

Recently, my "baby" graduated from college. I wanted to do something special to celebrate this milestone in her life so I told her I would make her a quilt...her first bed quilt made by me. I thought about making this a surprise, but decided to get her involved in the process of choosing the color and pattern. Her decision? A black and white string quilt. Black and white? Are you serious? I had never seen an all black and white quilt. This was going to be an adventure!


I found instructions for a string quilt at maryquilts.com I was familiar with Mary's site and found the details of constructing the block easy to follow. I realize now that I should have taken more photos of the work in progress, but it honestly was a fairly easy project to piece together.


I purchased various black and white prints, and tried to put it together with a scrappy look which makes string quilts so interesting. According to what I was able to research about this style of block, the blocks can be put together in the paper piecing method, or can be pieced on muslin. Since this was my first attempt at a string quilt, I chose the muslin method. One comment about the finished product was that the muslin did make the quilt heavier, but other than that I found no negatives constructing the blocks with a muslin backing, although it would be more difficult to hand quilt.
The above photo shows the finished quilt top ready to be pinned to the backing.
Ok...so now to determine how to quilt this thing. I've made many baby quilts, and lap quilts...but this was my first attempt at machine quilting a queen size bed quilt. I knew I needed some help to pull this off.

One of the most helpful ideas came from this you tube video. The video shares an idea on how to put together an inexpensive quilting table. Although I had a great basic set up, the idea that I gained from this video was to use of a large sheet of plastic to cover my sewing table.

I purchsed some quality plastic from Hobby Lobby for about $5.00. (You can find it in the fabric section on a roll. I think in days past, some women used this plastic to cover their furniture...lol) Once I had it laid out over my sewing space, all I had to do was cut a small hole for the needle to go up and down. I did struggle a bit to figure out just how this idea could be adapted to my space, but once it was set up, it worked like a dream. Even with a large queen size quilt, the fabric moved easily over the plastic.
As you can see, there is alot of fabric here to process!


I decided to stipple the entire quilt.
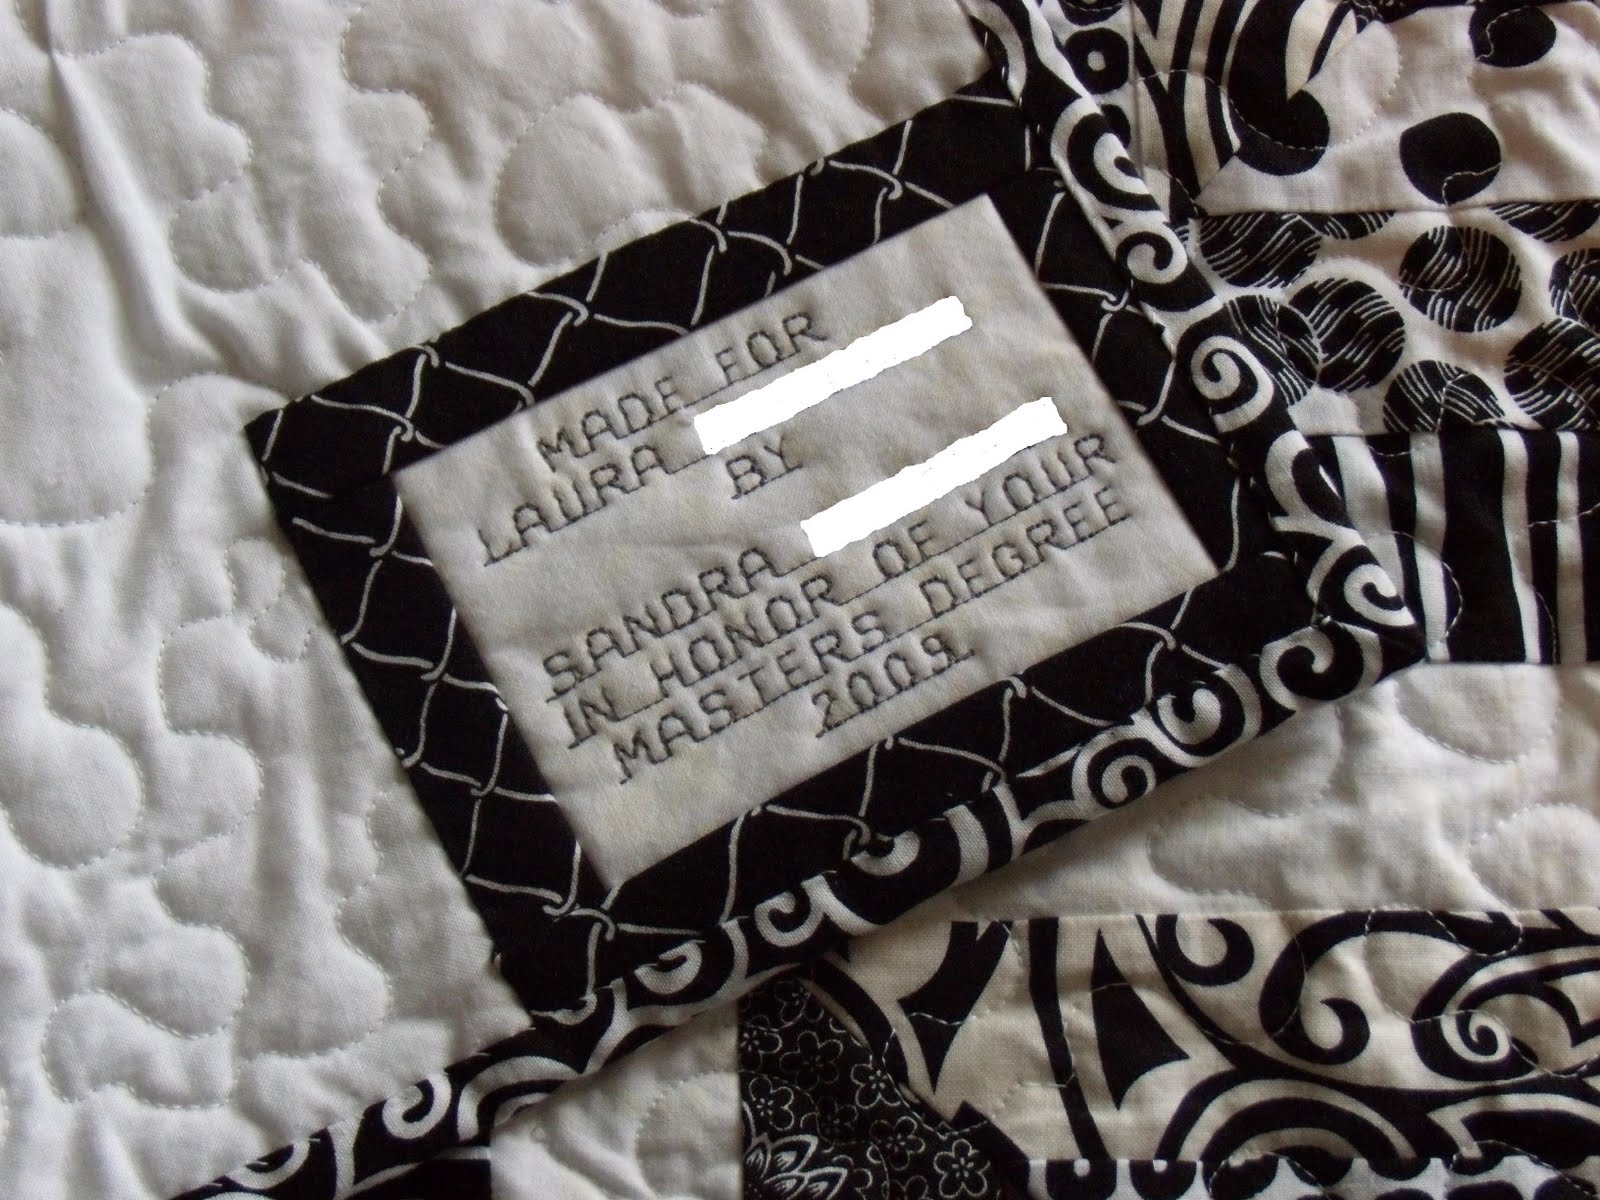
This a a close up of the quilting, and the tag I put on the back...
(Our last names are blocked out for privacy.)

...and wa-la...here is the finished product! I really didn't keep track of the number of hours it took me to quilt this, but was able to finish it over a five day period, working at it on and off. I regret that I didn't take more photos of the final product, but it turned out better than I ever expected. This won't be my last attempt at machine quilting a bed quilt:)

Wednesday, September 9, 2009

Doll Quilt Swap 7 Finished!

After searching my partner's website, I decided to use a traditional nine patch pattern and Civil War reproduction fabrics to make my project. I'm not sure why I've never used a charm pack before, but I found this packet at my local quilt shop and it looked like something my partner might enjoy.

I bought an extra yard of two coordinating fabrics for the backing and the border. After I laid out the charm squares, I began to understand why so many women enjoy using these pre-selected packets. All the tones of the fabrics blended together giving it a more professional look.

I cut each charm square into nine, 1 1/2 inch mini-squares.
Then I laid out the fabrics using lights and darks as in the photos pictured below.

I sewed the nine patch blocks using a regualr 1/4 in seam. It kept me on my toes to not sew over my fingers! I don't believe I've ever sewed anything so small, but it actually worked pretty well once I got the hang of it. Once the patches were sewed I laid the blocks out into a pattern for the quilt. I felt it needed something extra, so I used the half-square triangles in the corner to add a little character, and a pineapple paper piecing block in the center. If you would like to try this, you can find a free pattern online by Carol Coski.


Here is the finished product.....


....and a close up of the quilting.


For the back, I made an extra pineapple block, and made a quilt label which is hidden under the white piece of paper to protect our identity.


As I was looking at the fabrics that were left from this project, I noticed the selvege edge with the manufacturer's name. Just for fun I included that strip on the back of the quilt. Hope you enjoyed reading about my little project, and hopefully once this is received by my partner, I can add a few more photos.

Monday, July 13, 2009

I Spy An Adventure


These baby quilts were made for my nephew's children who live in California. The pattern is called square-in-a-square. Each quilt has 35 blocks. There are two blocks of each pattern for the little ones to match up....and one odd block that has no match....just for fun. There is a colorful pattern of flannel on the back.

Here is a close up of the quilting. This is basic free-motion quilting. I have to admit, I am getting more experienced at this style of quilting. Although, I am still far from being an expert. Guess I'll have to make a few more projects before I can claim that title.


I was tickled to see how much this little guy enjoyed his new quilt.
I think big sister enjoyed hers as well. What could make a quilt-maker happier than to see others enjoy a beautiful quilt?

Wednesday, July 1, 2009

Rail Fence Fun

This project was made using the rail fence pattern. I'm always open to trying new patterns...but...this was a pain to quilt! I tried to quilt in the ditch, which I now know was a mistake. LOL It would have been much easier to have used free-motion quilting.

This is my first attempt at using primary colors in a quilt. I actually like it, and will attempt more quilts in bright colors.


Trip Around the Block

It feels good to finally takes some time to upload photos of some of my latest projects! I have been sewing...just not posting. So....I will try to get better at making posting a priority. This baby quilt is made in the Trip Around the World pattern. Actually, all the patches are scraps leftover from other projects. I love the old fashioned look of the fabrics:)


This is a closeup of the quilting. Basically, I just sew across each edge of the quilt to form an "x" in each square. In the past, I have tried marking the fabric with chalk, and using a foot guage on my walking foot. With this quilt I used painters tape from the local hardware store, and just pressed it in a line across the blocks. It was quick and easy to follow. I'll try to take photos the next time I attemp to quilt this way.

Wednesday, February 4, 2009

Stacked Blocks

Baby quilt made for my niece's new little one. My mother-in-law loves purple, and I chose to use purple in this quilt to honor her. I thought this would mean something special to my niece.


Lavender Delight

Baby quilt made for my cousin's little girl. Yes...little girl. I've wanted for over a year to finish this quilt. It is a relief to be finished with it...and I think it turned out beautiful. I received a lovely thankyou note from my cousin...who said as soon as she opened the quilt, her little girl spread it on the floor and laid on it. How sweet! What child wouldn't love a quilt made just for them?

Double Four Patch Baby Quilt

This is quilt was made for my grandson Andrew. Isn't he a sweetie?


This baby quilt is made from scraps left over from other flannel lap blankets I've made. The pattern is a double four patch. I got the idea for the double four patch pattern from Mary at MaryQuilts.com. The most difficult challenge I faced in piecing this was to keep the lines in the fabric all facing in the same direction.


Monday, February 2, 2009

Road to California Wall Hanging

I made this wall hanging to celebrate my daughter's birthday. The pattern is the Road to California. When I had the top finished, I noticed one of the blocks was turned the wrong way. If you have the patience...look closely and see if you can find it. So...the question became to tear it out...or leave it as is. I decided that I am not a perfect person, and I'm ok with making something less than perfect. My daughter ended up hanging this in her foyer. It makes a great conversation piece to see if visitors can find the misplaced block.


This is the back of the quilt. If you look closely, you can see the block that is turned the wrong way.


Denim Baby Quilt

This denim quilt was made as a team effort by my sister-in-law and I. The quilt was made to celebrate the birth of a great-nephew. (I can't believe I'm old enough to have a great-nephew! LOL) We sewed squares of denim to flannel, and alternated the pattern so the back is a mirror immage of the front. No batting was used for this project. If you are considering making a denim quilt, it really helps to use a special needle designed for sewing denim.


Jacob's Ladder Baby Quilt

Baby quilt made for Lauren. The nursery was decorated in soft green and pink. I love the way this turned out.

Flannel Lap Quilt

Decided to make hubby an extra-long flannel quilt. Kitty always seemed to need to "help" after I had spread all my blocks out on the floor. It was a real challenge to work around him. Just looking at this photo makes me want to cry. My favorite kitty ever....is no longer with us.


Here is the finished product made with flannels and a few woven fabrics. The pattern is "trip around the world". Hubby is quite happy with a quilt made just for him.